Cycling by
the Riverside
How-to guide


Follow the step by step instructions below to begin your journey to owning your first NFTs, using the MetaMask Web3 wallet.If you do have a trusted friend or family member who is familiar with Web3 or crypto it is advised to ask them to assist you with getting started.
If that is not an option for you and you do get stuck, you are more than welcome to ask for help on our Discord server or send a mail to hello@portchie-nft.com.
Cycling by the Riverside is built on Ethereum, a blockchain that allows artwork creation and ownership to be authenticated & transferred. The NFTs are represented by unique tokens stored on the network and act as a permanent, tamper-proof record of provenance and ownership.
This adds intrinsic blockchain-backed value and makes its scarcity provable. The digital currency, or cryptocurrency, native to Ethereum is called Ether, or ETH. Every user of the Ethereum blockchain needs to have an Ethereum wallet. Your wallet is where your ETH and your NFTs are stored securely.
MetaMask is the leading Web3 cryptocurrency wallet. It is secure and compatible with almost all Web3 applications. To mint a Portchie Cycling by the Riverside NFT, you will need a MetaMask wallet.First, download the MetaMask iOS or Android app. Open the app and follow the prompts, as pictured below, to set up your wallet’s password.
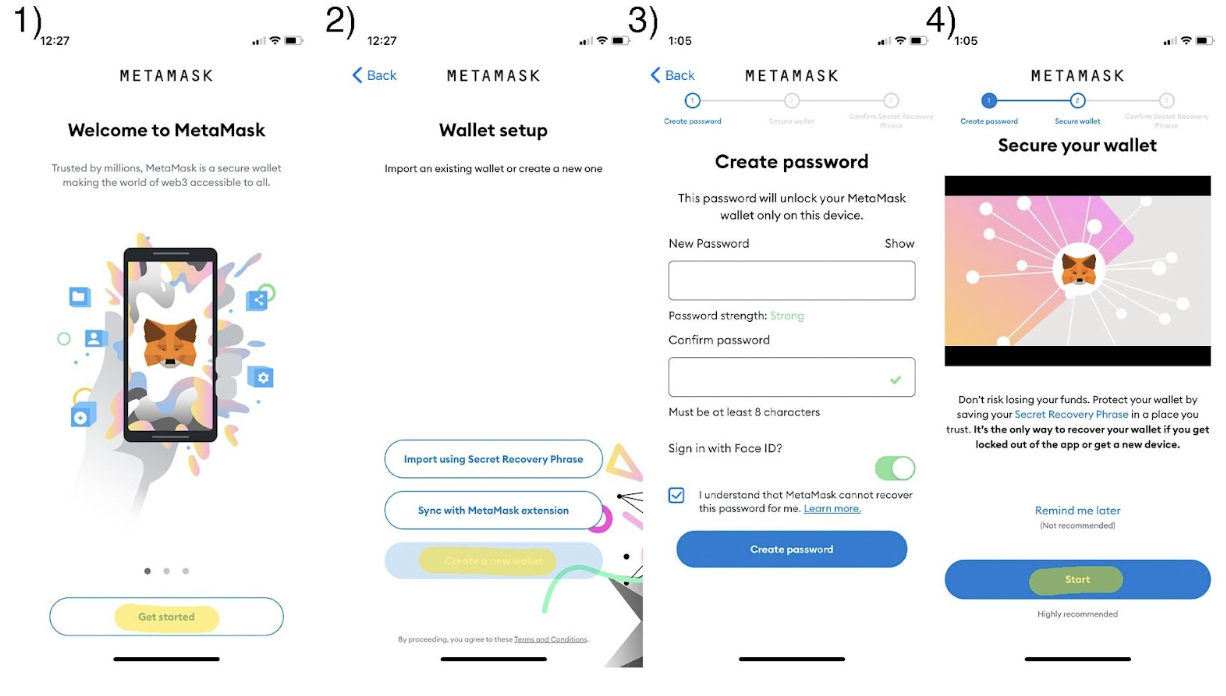
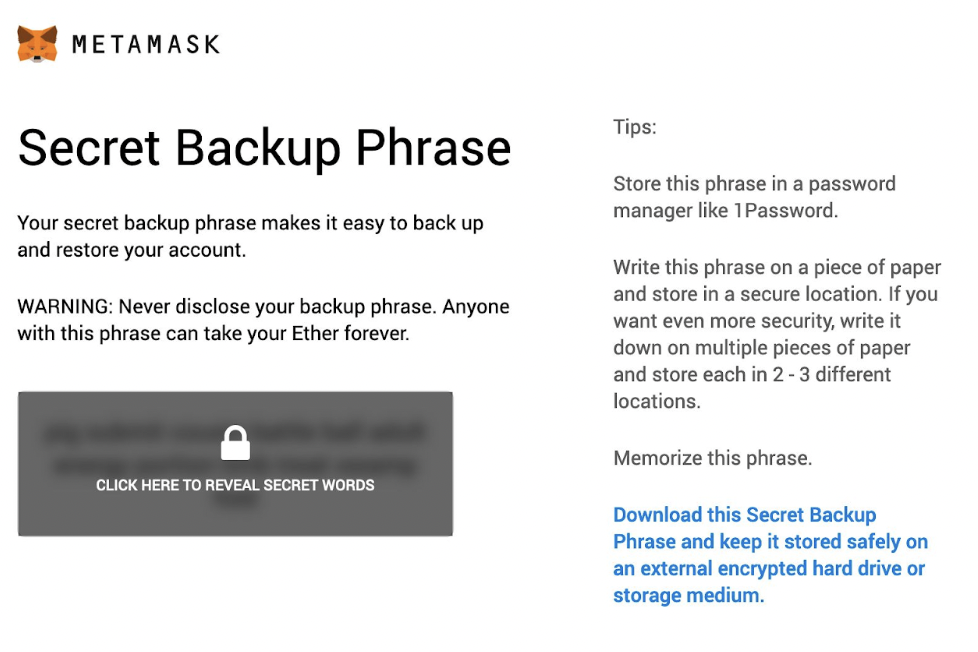
Next, you’ll see the “Secret Recovery Phrase” screen. Make sure to watch the “Secure Your Wallet” video attentively. These 12 words are VERY IMPORTANT to save OFFLINE in a secure location. These are ultimately the keys to your wallet and the only way to restore your account if you get locked out or lose your password or phone. If you lose your secret phrase, you will lose everything in your wallet and it will never be able to be retrieved.
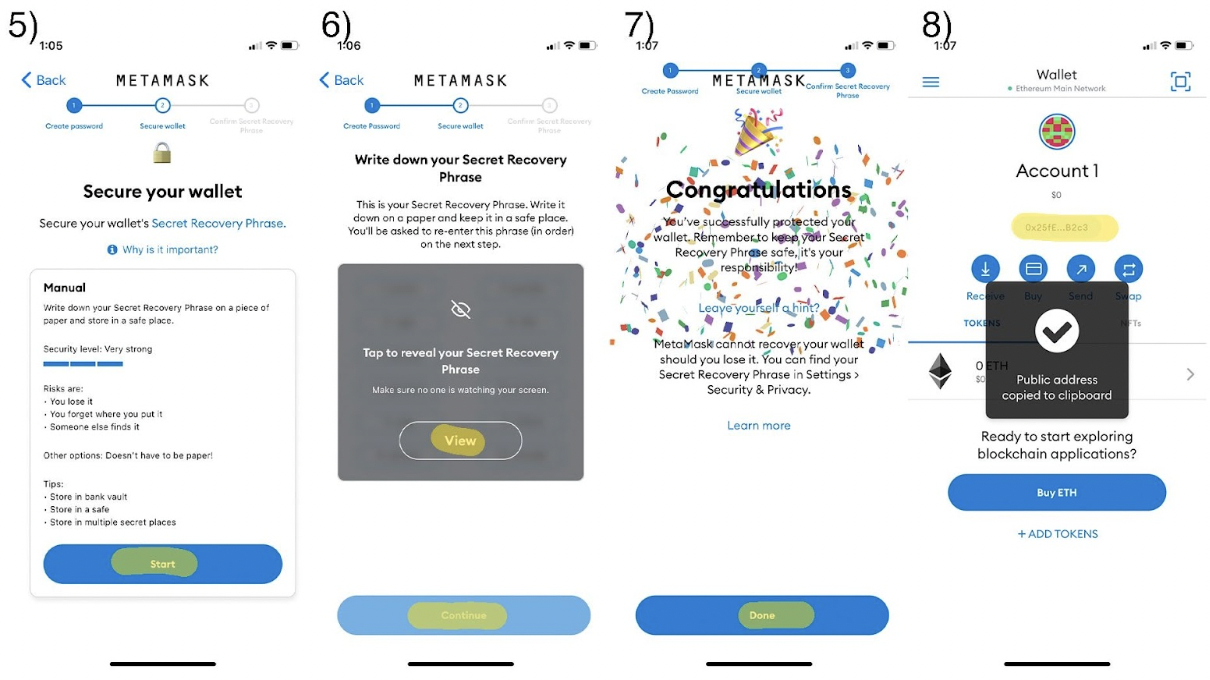
Some write their 12 words down and put it in a safe, while others memorise it. It’s not recommended to take a screenshot or mail/Whatsapp it to yourself as that would cause your wallet to get compromised the moment your device or mail gets compromised. Also, NEVER give your secret phrase to anybody.
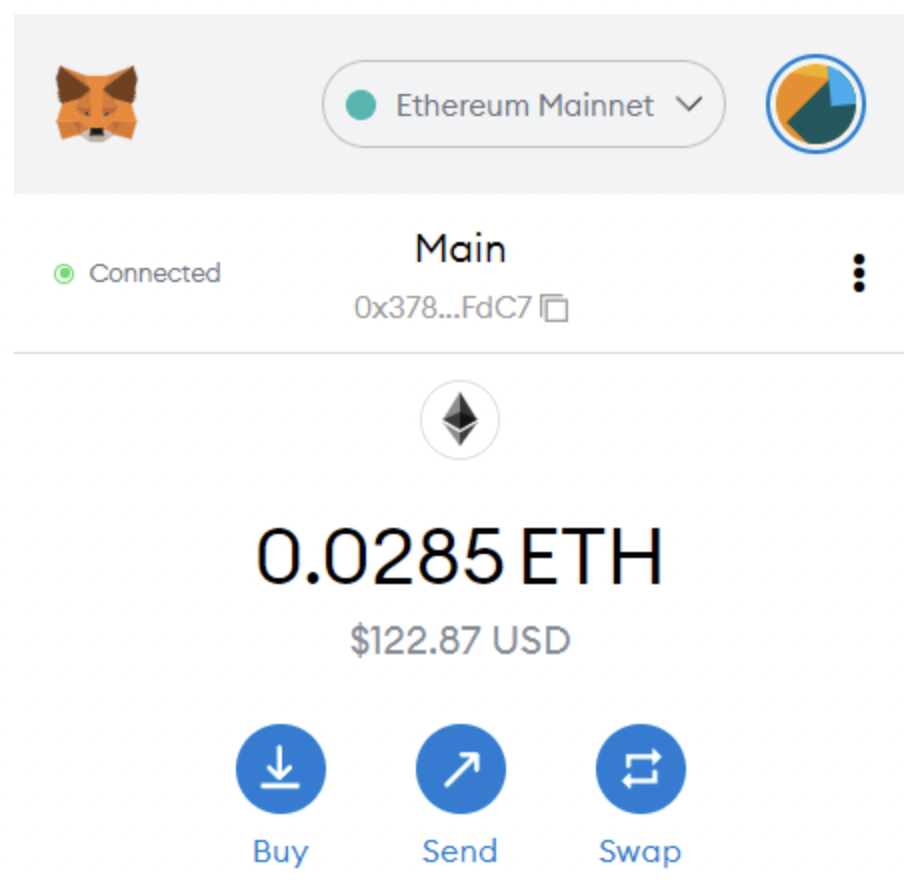
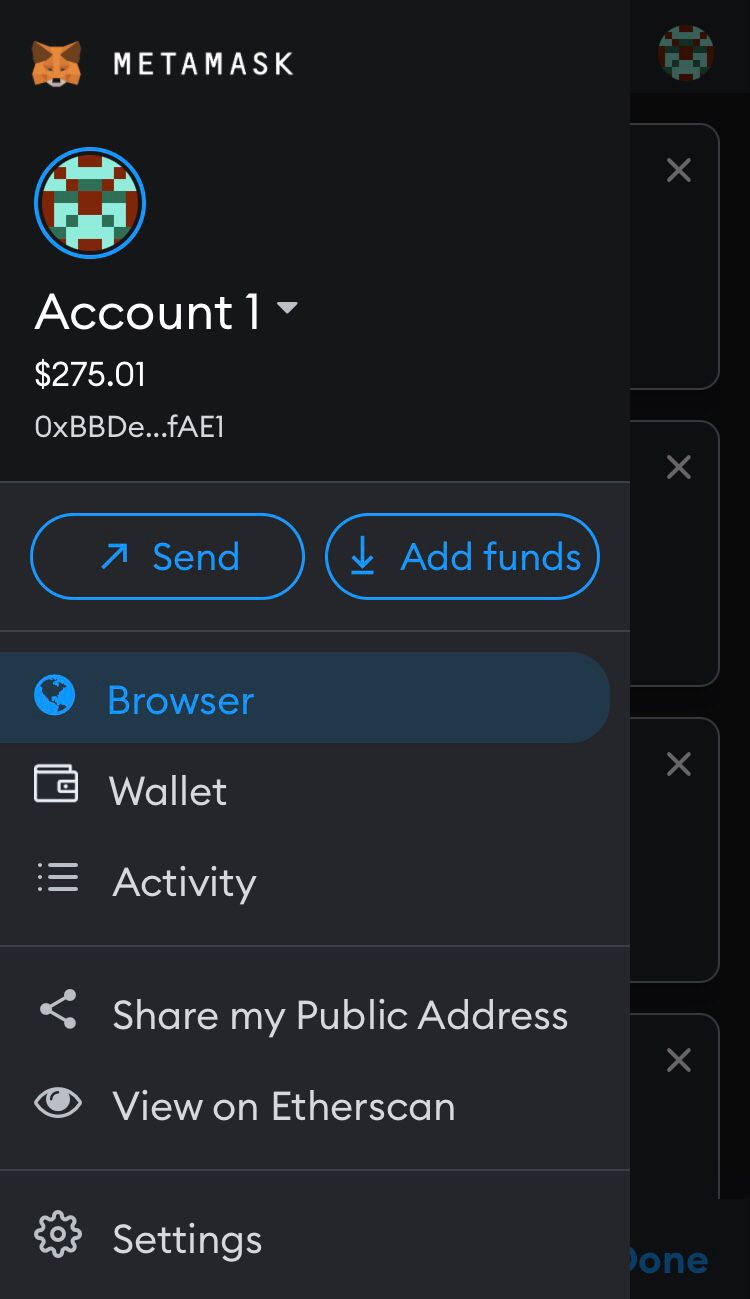
Your account should now look like the image labeled 8. Congratulations, you’re now the proud owner of your very first Ethereum wallet! You’re now able to use the built-in browser (accessed by clicking the 3 lines in the top left and selecting ‘Browser’) to interact with any Web3 applications (including portchie-nft.com from the 25th of August if you’re on the whitelist!) Please make sure that you only visit official trusted sites and never visit nor connect to any site you do not trust.
Go to MetaMask and install the MetaMask browser extension (we recommend using either Chrome or Firefox). Once MetaMask is installed, click on the fox icon in your browser extension panel and follow the welcome prompts to create a password for your brand new Ethereum wallet.MetaMask is the leading Web3 cryptocurrency wallet. It is secure and compatible with almost all Web3 applications. To mint a Portchie Cycling by the Riverside NFT, you will need a MetaMask wallet.
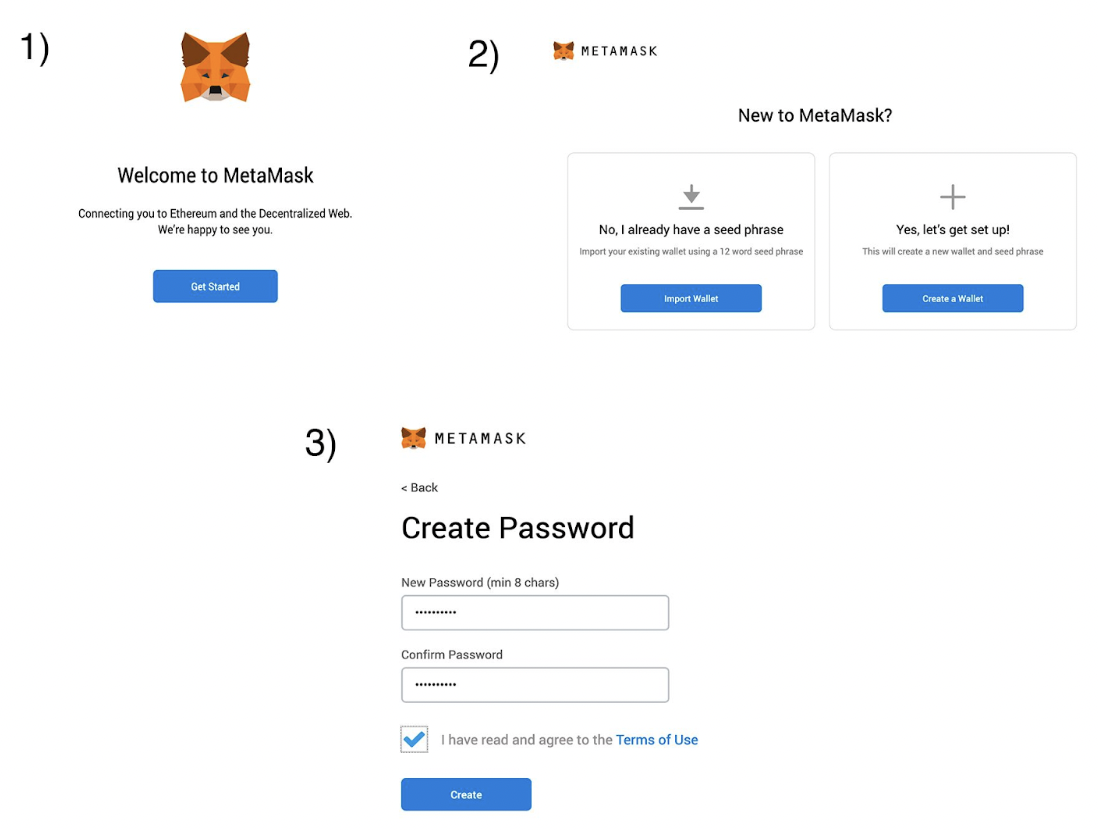
Next, you’ll see the “Secret Recovery Phrase” screen. These 12 words are VERY IMPORTANT to save OFFLINE in a secure location. These are ultimately the keys to your wallet and the only way to restore your account if you get locked out or lose your password or device. If you lose your secret phrase, you will lose everything in your wallet and it will never be able to be retrieved. Some write their 12 words down and put it in a safe, while others memorise it. It’s not recommended to take a screenshot or mail/Whatsapp it to yourself as that would cause your wallet to get compromised the moment your device or mail gets compromised. Also, NEVER give your secret phrase to anybody.
Your account should now look like this. Congratulations, you’re now the proud owner of your very first Ethereum wallet! Your MetaMask should look like this.
You should now be able to connect your wallet to a range of Web3 websites (such as Portchie-nft.com from the 25th of August if you’re on the whitelist), to interact with the blockchain! Please make sure that you only visit official trusted sites and never visit nor connect to any site you do not trust.
Most countries will allow you to use one of two methods to acquire your ETH; either directly through MetaMask, or by purchasing ETH on a secure cryptocurrency exchange that supports your local fiat currency.Currently South African banks will not allow card payments to any non-South African exchange, therefore South Africans will need to purchase ETH on a secure South Africa cryptocurrency exchange such as VALR or Luno.Instructions for funding your MetaMask wallet through VALR are outlined below. The method on VALR will be very similar on other cryptocurrency exchanges such as Luno. If you’re not South African and want to fund your wallet directly with MetaMask, you can navigate further down and find those instructions below the following.
1.Create (and verify) an account on VALR.
2. Follow the instructions here to buy ETH using your credit or debit card. Or here via a bank transfer.
3. Copy your unique wallet address from MetaMask by clicking where indicated.
4. In VALR, select ‘Withdraw’, then select ETH, then paste your MetaMask’s address where it says “Enter ethereum address,” then enter the amount of ETH to send. It is advised to first withdraw a very small amount to make sure that you’re doing everything correctly before you withdraw a big amount. Then click Review Withdrawal. You may be asked to perform another step to authorise the withdrawal.
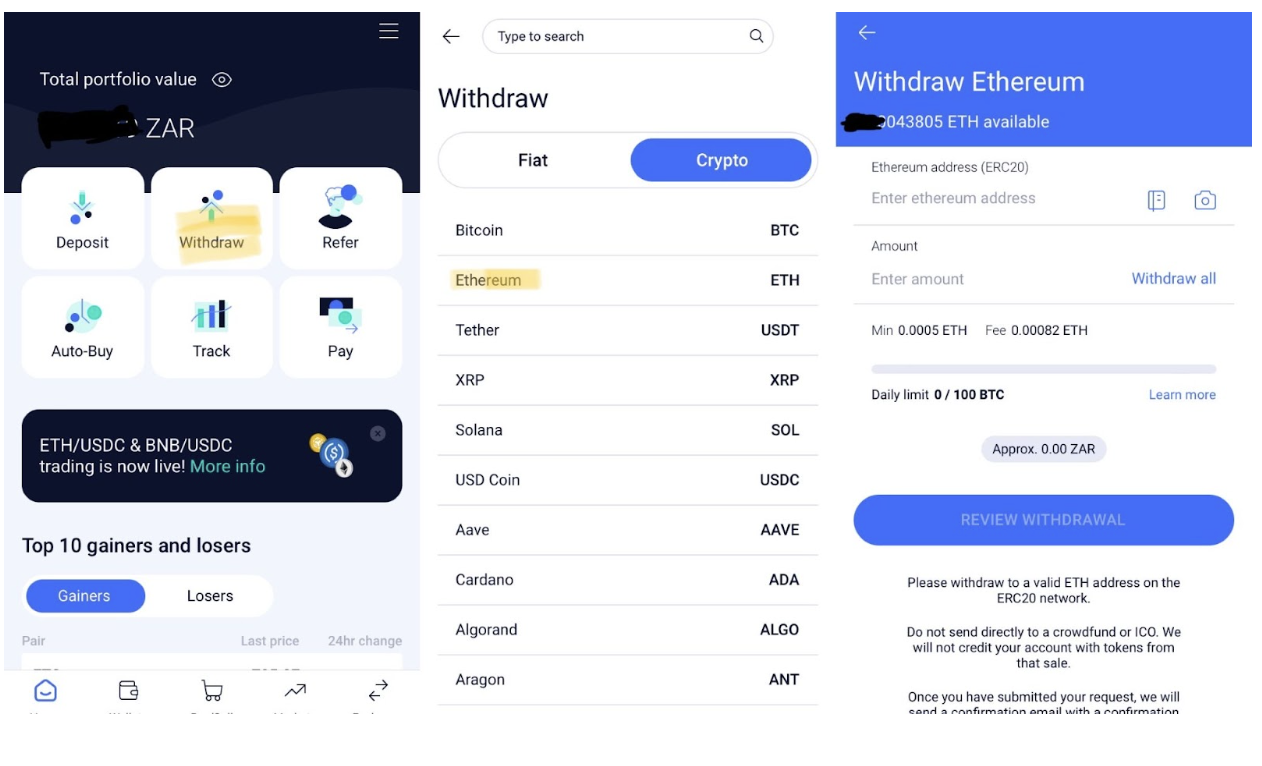
5. After a few minutes, the ETH should arrive in your MetaMask wallet. You can now repeat the process to withdraw your full amount. Remember to have enough ETH to cover both the minting fee (0.075ETH per NFT for Whitelisted addresses and 0.1ETH for public) as well as the gas fee. Gas fees, which is necessary to process transactions on the blockchain differ every minute according to how busy the network is. It usually fluctuates between +-0.00018Eth and +-0.025Eth. This gas fee gets payed per transaction which means if you select more than one NFT to mint you will only pay gas once for that transaction.
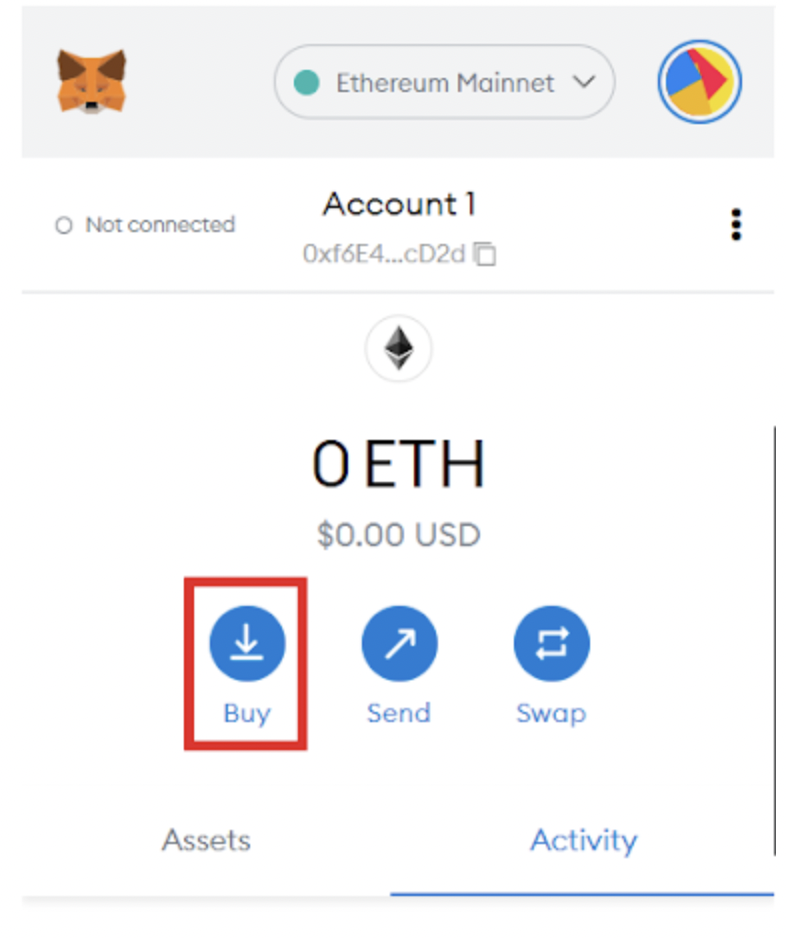
MetaMask makes it trivially easy to fund your wallet from your bank account by integrating with 3rd-party payment processors. Fees tend to be higher than using a crypto exchange. Remember this method will probably not work with a South African bank card.Open MetaMask and click 'Buy'
1. Open MetaMask and click 'Buy'
2. Select either Transak, Wyre, or Apple Pay to facilitate your purchase (availability may differ by region, different fees may apply).
3. Your browser should open a new window from which you can authorize payment.
4. Within a few minutes the purchased ETH should be credited to your MetaMask wallet.
OpenSea is the world's largest NFT marketplace by volume. Currently there are NFT from this collection for sale on OpenSea.
To buy an NFT, be sure to load your MetaMask wallet with Ethereum as per previous steps.
OpenSea offers various ways to acquire an NFT from other users:
1. Buy an NFT that is listed for sale at the price listed by the user.
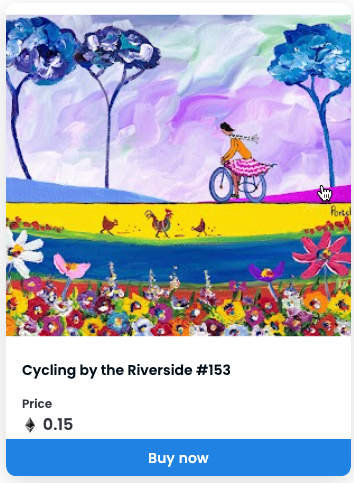
Find an NFT in the collection with a price listed. To buy the NFT at the listed price, click on "Buy Now". Connect your wallet using the MetaMask prompt and accept the collection notification prompt

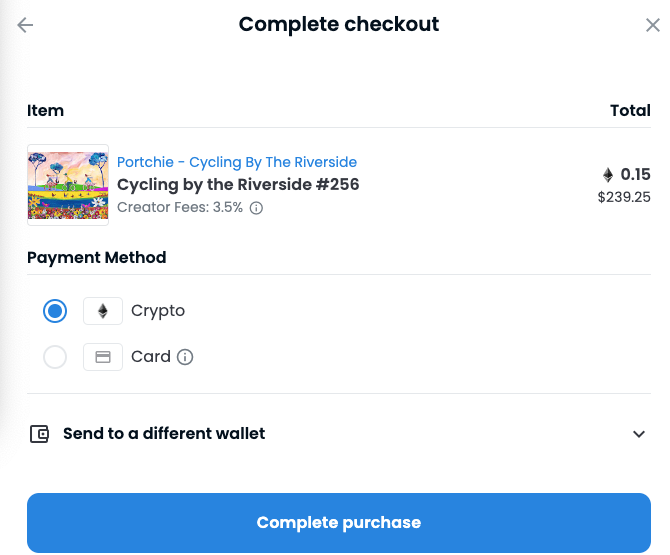
Click the "Complete Purchase prompt"
Alternatively, you can also:
2. Make an offer on any NFT that you like.
3. Participate in any auction by putting in a bid.
There are multiple ways to view your NFTs:
- If you want to have a basic view of them in your mobile MetaMask App, go to ‘Menu’ (top left corner), ‘Settings,’ ‘Advanced,’ then enable ‘Enhanced Token Detection.’ You should now be able to see them in your ‘Wallet’ under ‘NFTs’ (next to ‘TOKENS’). If not, you can click on ‘Import NFT’ and paste the collection’s address (0x59FAd83d35b71409bfB4Ba24b4bF7C78c25C519c) and your token ID (the number of your token e.g. 53 or 907)
- Currently, the most convenient place to view, trade and transfer your NFTs would be on OpenSea.ioThere you can easily see all the special details of your NFT as well as the other collectibles from Cycling by the Riverside that you do not own.With your MetaMask enabled browser, visit opensea.io and connect your wallet to their site. Navigate to your profile to see all the NFTs in your wallet.
Early next month portchie-nft.com will be updated with an order form page.You’ll need to again connect your wallet, and make sure the NFT you’re claiming the print for is in your wallet. You’ll then receive a confirmation email with an estimated date of delivery etc.
- If the transaction was submitted to the blockchain view it on https://etherscan.io/ with the link provided under the mint button. If successful then the NFT was created otherwise an error message will be provided.
- If you lost the transactionID, view your wallet address on https://etherscan.io/ and see the last, or one of the last, transactions and view the details.
- If you are unable to see the mint button during the whitelist phase then your address was not added to the whitelist. Please ask for help on Discord if your address should have been whitelisted.If an error occurred before the transaction was submitted to the blockchain it might indicate that you do not have enough Eth balance or you rejected the transaction.
- If you are unable to solve the issue please contact us on Discord with enough details like transactionID, your wallet address and any error messages that you get.
Just a reminder that, as stated in the terms and conditions, you are using a third party application on the Ethereum network, completely unaffiliated with Cycling by the Riverside, to mint your NFT. Therefore Cycling by the Riverside cannot be held accountable nor issue refunds for any losses incurred due to network failures, failed transactions caused either by the network, your wallet or your incorrect use thereof.
You are also expected at all times to take full responsibility for the security of your MetaMask wallet as you were informed when you created it, and know the risks if you don’t.If you lose your secret phrase or if it get’s compromised due to storage in an unsafe place (like on your phone or computer), nobody can ever retrieve access to your NFTs.
- Go to OpenSea.io and connect your wallet.
- Go to the NFT that you would like to transfer.
- Click on the little paper jet “transfer.”
- Paste the address you’d like to transfer your NFT to.
- Confirm transaction.